Monday, March 30, 2026

MikroTik Basic Setup

 1. First download .vmdk version.

2. Create Vm.

  • Create a new VM and, when prompted for the disk, select Use an existing virtual disk and point to the downloaded .vmdk file.
  •  Select Linux as the guest OS and Other Linux kernel (64-bit) as the version.
  •  Adapter 1 (WAN): Set to Bridged (IP hobe office/home or ISP ja dia local pc net pay).
  • Adapter 2 (LAN): Set to a LAN Segment or Host-only (VmNet 1, 2 and so on)

3. Install

  •  Power on the VM.
  • When the installer loads, press a select all packages and i install. Use the default username admin  with no password

4. Setup via Winbox.

  • IP>Address eth1>(WAN)192.168.99.115/24 eth2>(LAN1)192.168.1.1/24 eth3> (LAN2)192.168.2.1/24
  •  Enable DHCP on both LAN, so that connected user/pc get IP/internet from that. 
  •  IP>DHCP Server>DHCP Setup> Select lan interface and provide GW, range and so on next..........

5. Enable NAT.

  •  IP>Firewall>NAT>Chain : srcnat > Out Interface : WAN/Bridge/eth1 >action: masquerade


6. DNS Setting.

  • Go to IP > DNS. Servers: Add 8.8.8.8 and 1.1.1.1.Check the box Allow Remote request. done.

7. Static Route (most important).

  •   Go to IP > Route > Dst.Address: 0.0.0.0/0 Gateway: host pc/WAN gateway(99.1)
  • Distance:1.  All Done


Friday, May 9, 2025

How to disable IP auto-configuration in PC


Step 1: Run > cmd > ipconfig /all
Looks to see which IP is the preferred and if autoconfiguration is on.
Step 2: netsh interface ipv4 show inter
Step 3: netsh interface ipv4 set interface 11 dadtransmits=0 store=persistent
Step 4: services.msc
After running this command. Look for your index number: ex (11)
Disable the DHCP Client service. If you ever go back to DHCP from static, remember to set this back to automatic.

Thursday, October 26, 2023

EVE-NG cheet-chaat

1. setup vmware workstation
2. download free eve edition .ovf file, unzip and open/import into the vmware.
3. eveng te ektai NIC thakbe ja auto bridge e (wan ip hobe home or office ja dia net pay) dewa jabe abar host only o dewa jabe. 

pfsense installation:

1. open a folder to /opt/unetlab/addons/qemu/pfsense-2.6.0 via winscp and copy iso file into that.
2. change directory to that folder cd //opt/unetlab/addons/qemu/pfsense-2.6.0 and see the file with ls command.

 3. rename that fille into cdrom.iso mv pfSense-CE-2.6.0-RELEASE-amd64.iso cdrom.iso
4. create virtioa.qcow2 image into that location /opt/qemu/bin/qemu-img create -f qcow2 virtioa.qcow2 20G

5. now you see 2 file cdrom and virtioa
6. create node via web eveng, connect via management cloud.
7.  Find out the POD ID of your used and the Node ID of your newly installed node and go there.
cd /opt/unetlab/tmp/10/85bd7141-e2a7-43e6-8307-bfa7b301a12b/1/
8. you will see cdrom.iso l1down_0 l1down_1 mon-sock mon2-sock qmp-sock virtioa.qcow2 these files.
After installation done , commit the below file.

9. /opt/qemu/bin/qemu-img commit virtioa.qcow2

https://www.eve-ng.net/index.php/3380-2/


Friday, June 23, 2023

core-sw configuration

 interface FastEthernet 1/0

  switchport trunk encapsulation dot1q

  switchport trunk allowed vlan 1-2,1002-1005,80,90

  switchport mode trunk

  ip name server 8.8.4.4 & 192.168.16.2

  no shutdown


interface FastEthernet 1/2

  switchport trunk encapsulation dot1q

  switchport trunk allowed vlan 1-2,1002-1005,80

  switchport mode trunk

  no shutdown


 interface FastEthernet 1/3

  switchport mode access

  switchport access vlan 80

  no shutdown


 interface FastEthernet 1/4

  switchport trunk encapsulation dot1q

  switchport trunk allowed vlan 1-2,1002-1005,90

  switchport mode trunk

  no shutdown


do show ip int br

show int status


Tuesday, April 18, 2023

GNS3 Setup with VmWare Vm


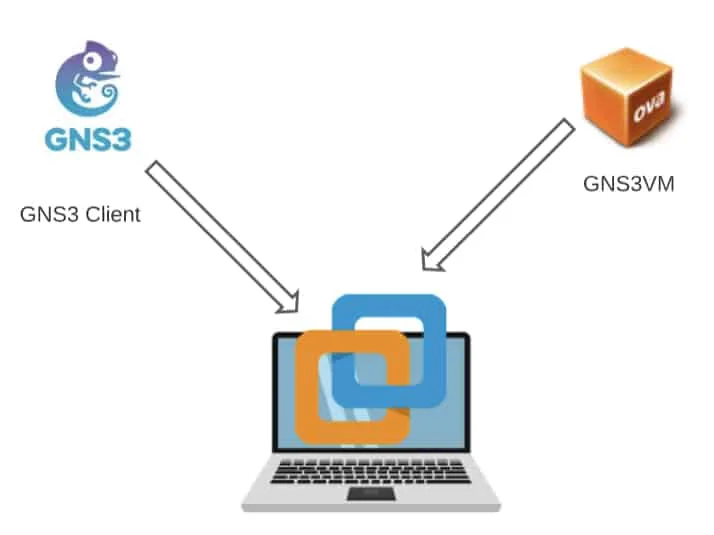
Firstly, This is the very common method of installing the GNS3 software. First you install and configure the GNS3 client on the machine. And then you configure the GNS3VM in the VMware workstation.

In this method both the GNS3 client and the VM runs on the same machine.

1st: need same version of gns3 software, gns3 vm.ovf and vmware workstation (2.2.38)

2nd: 1st network adapter (eth0) must need to be in NAT(vmnet8), add more as per your need.

3rd: install gns3 software now. 

than preferrence e jeye server> enable local server >host binding (NAT IP dekiye dewa lagbe)

gns3 VM > enable gns3 vm >Vm machine ta dekiye deya lagbe

 installation done 

link: https://getlabsdone.com/how-i-have-setup-my-gns3-10-easy-steps/

Tuesday, February 21, 2023

PfSense Setup

1. Host PC: 

need 2 vartual adapter one is NAT other is host only 

        NAT IP 192.168.12.1 SM: 255.255.255.0 

        LAN-10: 192.168.10.2 SM 255.255.255.0 

        no gateway for both

2. VM setup and install pfsense

        1st e install dia LAN IP set korbo 192.168.10.1>>24>> enter >enter>no GW>no dhcp> enter

Then, open browser and access.        

        1st adapter  for WAN:  type NAT (IP: 192.168.12.104/24  GW: 192.168.12.2 je GW ta VM NAT e auto create hoi) ba original home ba office er router er IP and GW use kora jabe .

        2nd adapter LAN-10 (IP: 192.168.10.1  GW: no need)

now auto net peye jabe r kichu kora lagbe na.

System > Routing e wan er GW dekabe. static route lage na 1st e.

Status > GW te gele GW online dekabe jodi net take taile.


Wednesday, October 26, 2022

Customized OS with pre install Software.

first paste windows.iso in ISO folder inside the MSMG toolkit. START toolkit.......

enter 1 > source and dvd folder e extract kora lagbe...

than.. 3> sodo ekta version rakbo jeta lagbe sodo seta..

then REMOVE korbo ja ja features lagbe na segola (1) confirm(enter 2) .....

than APPLY and N after that TERGET and make a DVD iso image.


First customize OS via MSMG Toolkit and make an ISO

1. Install OS with all needed software.

2. Go to C:\Windows\System32\Sysprep and select tick mark with shoutdown option as a admin

3.Boot PC with Hiren boot ISO than save C/OS drive into other drive (:D) as "install.wim: as a ISO.

4. Execute disc.exe /Capture-Image /ImageFile:"D:\install.wim" /CaptureDir:C:\ /Name:"win10pro"

5. Open AnyBurn > Edit Image File>  select OS ISO. delete old install.wim file from source and add new one which u made. And finally make an ISO with proper name,


Thursday, September 29, 2022

Fortinet wan to lan RDP

 TASK: RDP দিয়ে কেউ WAN/public IP  তে হিট করলে সেটা নির্দিষ্ট LAN এর পিসি তে নিয়ে যাবে.

First e virtual IP create kora lagbe, 


now make a policy to make it happend 


Wednesday, September 14, 2022

Terms to remember

 STUN Server/port: STUN server identify the unique IP address for a web browser user. This is neeeded in order to established a peer to peer connection and exchange data/video/audio. port is 3478/3489. Session Traversal of User Datagram Protocol [UDP] Through Network Address Translators [NATs])


Tuesday, August 23, 2022

VmWare fortigate Firewall setup

 VmWare fortigate Firewall setup:


Must download : New deployment of FortiGate for VMware out.ovf.zip _ version

host pc: 1. vmnet10. IP: 192.168.10.10 & subnet, no GW

              2. vmnet11. IP: 192.168.11.10 & subnet, no GW

VM virtual network: vmnet10, & 11 host only.

                                    vmnet0 Bridge auto.

Fortigate FW:  Network adepter : bridge auto.

                          Network adepter : vmnet10

                          Network adepter : vmnet11

                          Continue..............................

setup commands:  config system interface

                      edit port1>set mode static>set ip 192.168.99.160 255.255.255.0(WAN/host pc er ip serise)

                      set allowaccess http https ping ssh > end (done , now call by web browser)

                      Set more by CLI (optional): configure router static > edit 1

                                                                    >set dst 0.0.0.0/0 > set gateway 192.168.99.1

                                                                    >set device port 1 > end

                                                                   config system dns > set primary 8.8.8.0 > end

                   Vm free License : >execute vm-license-options account-id daxxxxx@gmail.com

                                                  >execute vm-license-options account-password ayyyyyx

                                                  >execute vm-license > Do you want to continue? (y/n) > y


interface setup > define port1 to wan main> port2 to vmnet10 and port2 to vmnet11  

DNS setup  to 8.8.8.8 and 4.4.2.2         

SD WAN > main wan dia virtual wan link banabo, rules set korbo all dia.

static routing > 000000 to  virtual wan link dia traffic jabe.


policy: lan-10 to internet > incoming: lan-10,

                                           out :virtual wan link,

                                           source: lan-10, 

                                           des: all >  all>all  > > >

           lan-11 to internet > incoming: lan-11,

                                           out :virtual wan link,

                                           source: lan-11, 

                                           des: all >  all>all  > > > 

Client01 :

Client02 :

Fortinet Licence Issue:  Config system ntp

                                        set ntpsync disable

                                        set type custom

                                        end than reboot

Disk: execute disk list  || execute disk scan -rj16 


Thursday, June 2, 2022

VMware_Mikrotik load balance and failover

  Senario: WAN-1 (Primary): IP: 192.168.99.120/24 Gateway: 192.168.99.1(IP>Route e দিতে হবে পরে ) Interface: wan-1 ধরুন এটি ether1 পোর্ট...